Saturday, 26 March 2016

How To Root Any Android (SMARTPHONE) Without Computer.

Hello Readers My Name is Shanzay Khan & Today I am Going To Show you How To Root Any Android (SMARTPHONE) Without Computer

In This Trick i Will Tell You The Simplest & The Easiest Method To Root YOur Android Without Computer
So Lets Start
First of All You Will Need To Enable Enable UNKNOWN Sources Installation
Go To Setting>Security>under Device Administration>Check Unknown Sources
Then Download The KingoRoot For Android.apk From Here
 Kingo Root Apk for Android

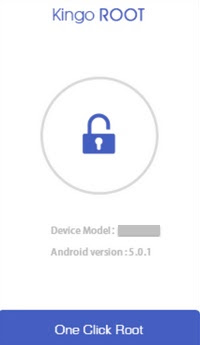
After Downloading Install it & open It As You Open It YOu Will See One CLick Root Option
How To Root Any Android (SMARTPHONE) Without Computer

Click On It & It Starts Downloading Your Device Be Patient & Donot Turn YOur Off During Root Installation.

How To Root Any Android (SMARTPHONE) Without Computer
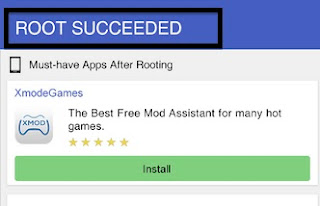
Once Root Completes It will Be Notify With the Msg That your Device Has Been Rooted
How To Root Any Android (SMARTPHONE) Without Computer
Done Now You Have Successfully Rooted Your Device
Enjoy Keep Visitin MUZAMILTRICKS.COM & Dont Forget To Follow me On SOcail Media
Shanzay Khan
Facebook
Twitter
Google Plus

Thursday, 24 March 2016

How To Fix Android Can't Write External SD Card (while Saving Downloaded Data on SD Card) Error

Hello Reader My name is Shanzay khan & Today i am Going To Show You How To Fix Android can't Write External SD Card (while Saving Downloaded Data on SD Card) Error
So Lets Start;
How To Fix Android Cant Write External SD Card (while Saving Downloaded Data on SD Card) Error


You Already Knows That Android Developers Has Putted Some Restriction's so You Cant be Able to save The Downloaded Things On your SD Card Directly

So in this Trick I am Going to show you How To Remove This Restrictions
First of All you have To Do is You Have To Root Your Device I have Told That How To Root Your Device In My Previous Posts But Today I Will Tell You the simplest & The Easiest Method Ever To Root your Device
All You have To Do is Download This Apk File Name Kingo Root Apk Provided By Kingo Root from here;
  Kingo Android Root.apk
After Downloading Install It & Open It Click on The One Click root & It Will start Rooting Your Device
How To Fix Android Cant Write External SD Card (while Saving Downloaded Data on SD Card) Error

 Once your Device Is Rooted Follow the Below Steps
    • Make Sure Your Device has Been Rooted
    • Make A Backup Of All OF YOur Data In device
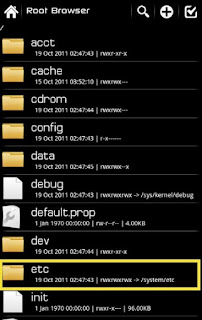
    • Then Open Root Browser & navigate to /system/etc/permissions
     
    How To Fix Android Cant Write External SD Card (while Saving Downloaded Data on SD Card) Error
    How To Fix Android Cant Write External SD Card (while Saving Downloaded Data on SD Card) Error

     You can Download Root Browser Paid Version From Here
  • Root Browser Paid Version Only For You
    • In Permissions Edit platform.xml and find the Section Named “WRITE_EXTERNAL_STORAGE“
    •  Add a Additional command under WRITE_EXTERNAL_STORAGE : <group gid=”media_rw” />
     
    How To Fix Android Cant Write External SD Card (while Saving Downloaded Data on SD Card) Error
    How To Fix Android Cant Write External SD Card (while Saving Downloaded Data on SD Card) Error
    • Save The Changes & Restart your device
    Now You Should Be Able To Save Files Directly To Your SD Card Instead Of Copying Or Moving Files From Phone Storage To SD Card
    I You are Having Problem in Anything I have Briefly Explained This Method Below.
 Briefly Explained Above Method;
  • First you will have To Download Root Browser Install It & Open it
  • It Will Ask You To Download Utilities Click Yes Wi8 For To Download Its Utilities
  • Now You Will See A System In this Folder you Will Have To Navigate To etc & In Permission & in Permissions Find Platform.xml click On it & Open it As the Text File Now That The file has been Open Find WRITE_EXTERNAL_STORAGE in that file & Under That You Will have to Enter This Additional Command <group gid=”media_rw” /> After Putting This Save It & Restart Your Device
  • Now You Should Be Able to Write Your External SD Card
Done Enjoy Keep Visiting MuzamilTricks.com & Don't Forget To Follow Me On SOcial Media
Shanzay khan
Facebook
Twitter
Google Plus

Wednesday, 23 March 2016

How To Upload Videos To Facebook,YouTube With Copyrighted Music Legally.

Hello readers My Name is Shanzay khan & Today i am Going To Show You How To Upload Videos To Facebook,YouTube With Copyrighted Music Legally.
How To Upload Videos To Facebook,YouTube With Copyrighted Music Legally.


You Know That Facebook Has Launched New Policy that It Will Scan Your Video & If You had Any Copyright Materiel In It Then Facebook Will Remove Your  Video

In this trick i am Going to Show you How to put your Videos on YouTube ,Facebook with Copyrighted Music & Your video will not Removed By YouTube or Facebook.
So Lets Start.

First of All You Will Need To Download & Install a Software Named Windows Live Movie Maker
Link To Download Windows Live Movie Maker;
Download It From Here

  • After You Installed Movie Maker Open It
  • Then On the Above Corner You Will See Option Add Images Or Videos Click OnIt

How To Upload Videos To Facebook,YouTube With Copyrighted Music Legally.


  • Add Your Video
How To Upload Videos To Facebook,YouTube With Copyrighted Music Legally.

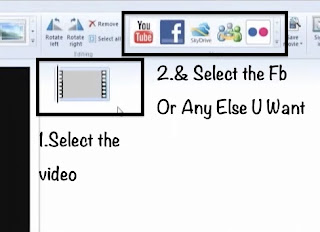
  •  After Adding Video You Can Edit it Or Just Simply Select that Video & Click On the Facebook Option
 
How To Upload Videos To Facebook,YouTube With Copyrighted Music Legally.

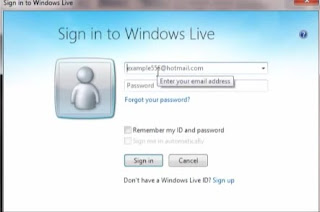
  • After That It Will ask You To Login To Windows Live Account 
How To Upload Videos To Facebook,YouTube With Copyrighted Music Legally.

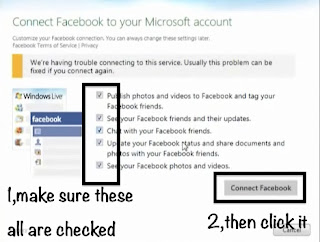
  • As Soon You Logined Your Windows Live Account it will Open a Windows Like This Make Sure to Check All Points then Click On Connect to Facebook
How To Upload Videos To Facebook,YouTube With Copyrighted Music Legally.

  •  Your PC Browser Will open A Facebook Login Page Login in To Your Facebook Account After  That It Will Start Uploading your Video

Done Your Video Has Been Uploading Through Windows Live Maker Now YouTube Or Facebook Will Not Be Able Remove Your Video
Done Enjoy Keep Visiting MuzamilTricks.com For More Latest & Interesting Tricks & Don't Forget To Follow Me On Social Media
Shanzay Khan
Twitter
Facebook 
Goggle Plus

Sunday, 20 March 2016

How To Jailbreak Iphone 6,6plus,6s,6s(Plus) Ios 9,(9.0),(9.0.1),(9.0.2),(9.1)

Hello Readers My Name Is Shanzay Khan & today i am Going To Show You How To Jailbreak Iphone 6,6plus,6s,6s(Plus) Ios 9,(9.0),(9.0.1),(9.0.2),(9.1)
How To Jailbreak Iphone 6,6plus,6s,6s(Plus) Ios 9,(9.0),(9.0.1),(9.0.2),(9.1)


So lets start
  • First Of All Back-up You Device
  • Then Download Pangu9 Tools For YOur Operating System To Jailbreak Ios 9
  • Pangu Downloading Links
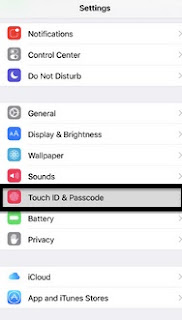
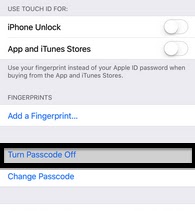
  • First of All On On Your Iphone Go To Setting & in the Setting Go Touch ID & Passcode
How To Jailbreak Iphone 6,6plus,6s,6s(Plus) Ios 9,(9.0),(9.0.1),(9.0.2),(9.1)
  • In the Touch Id & Passcode Turn Of The Passcode or Touch Id
How To Jailbreak Iphone 6,6plus,6s,6s(Plus) Ios 9,(9.0),(9.0.1),(9.0.2),(9.1)
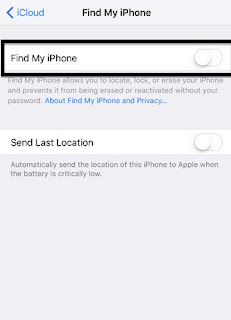
  • After That Go To Icloud & Turn Off Fing My Iphone
How To Jailbreak Iphone 6,6plus,6s,6s(Plus) Ios 9,(9.0),(9.0.1),(9.0.2),(9.1)
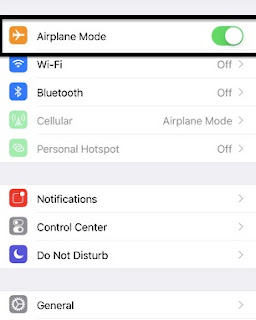
  • The Back In The Setting Turn On The AirPlane Mode
How To Jailbreak Iphone 6,6plus,6s,6s(Plus) Ios 9,(9.0),(9.0.1),(9.0.2),(9.1)

  
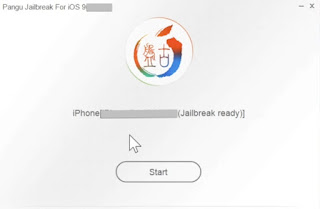
  • Now On Your Computer Open The Pangu & Connect Your IPhone 
How To Jailbreak Iphone 6,6plus,6s,6s(Plus) Ios 9,(9.0),(9.0.1),(9.0.2),(9.1)

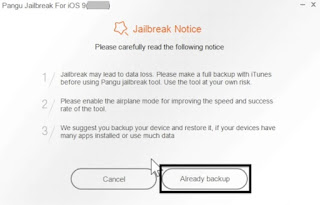
  • Now click start After That You will see A Notice From Pangu That backup Your Device Click Already Backed up To Continue
How To Jailbreak Iphone 6,6plus,6s,6s(Plus) Ios 9,(9.0),(9.0.1),(9.0.2),(9.1)

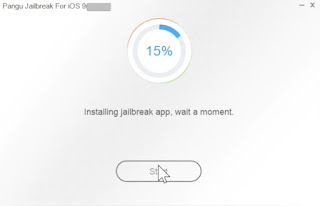
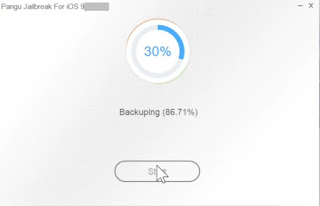
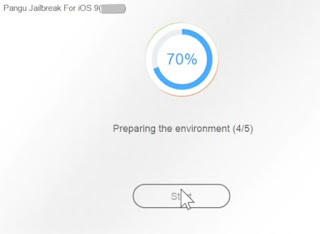
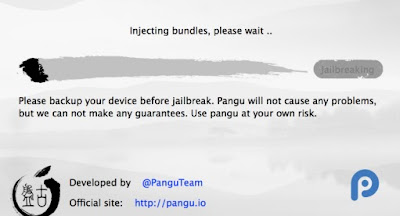
  • Now Pangu will Start JailBreaking your Iphone 
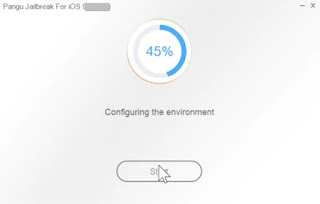
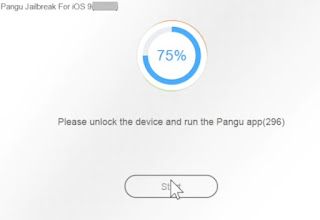
  • Here Are The Screen Shots Of Pangu During Jailbreak

How To Jailbreak Iphone 6,6plus,6s,6s(Plus) Ios 9,(9.0),(9.0.1),(9.0.2),(9.1)

How To Jailbreak Iphone 6,6plus,6s,6s(Plus) Ios 9,(9.0),(9.0.1),(9.0.2),(9.1)


  •  After Configuring The Environment It will Restart your Device Wi8 For It To COmplete its Restart
How To Jailbreak Iphone 6,6plus,6s,6s(Plus) Ios 9,(9.0),(9.0.1),(9.0.2),(9.1)


  • After Restart Unlock Your Iphone & turn On the AIRPLANE MODE again
How To Jailbreak Iphone 6,6plus,6s,6s(Plus) Ios 9,(9.0),(9.0.1),(9.0.2),(9.1)
  

  • in Then Wi8 Until Pangu Completes its jailbreaking
How To Jailbreak Iphone 6,6plus,6s,6s(Plus) Ios 9,(9.0),(9.0.1),(9.0.2),(9.1)


  • After that You Will See A Pangu Icon You Iphone Device unlock your Iphone & open The Pangu app

How To Jailbreak Iphone 6,6plus,6s,6s(Plus) Ios 9,(9.0),(9.0.1),(9.0.2),(9.1)
  • As Soon You open the pangu app on iPhone You will See A Notice Click Accept To Continue
How To Jailbreak Iphone 6,6plus,6s,6s(Plus) Ios 9,(9.0),(9.0.1),(9.0.2),(9.1)


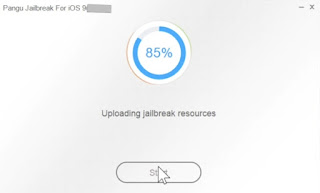
  • After that Pangu Will Upload The Jailbreak Resources On Your Device


How To Jailbreak Iphone 6,6plus,6s,6s(Plus) Ios 9,(9.0),(9.0.1),(9.0.2),(9.1)

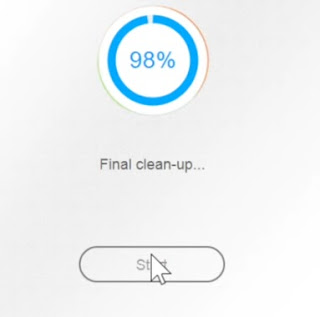
  • After Uploading Completes Pangu will Start Final clean-up
How To Jailbreak Iphone 6,6plus,6s,6s(Plus) Ios 9,(9.0),(9.0.1),(9.0.2),(9.1)
  • Done You Have Jailbroken Your Iphone 
How To Jailbreak Iphone 6,6plus,6s,6s(Plus) Ios 9,(9.0),(9.0.1),(9.0.2),(9.1)

You Have successfully Jailbroken Your Iphone
Enjoy & Keep Visiting MuzamilTrIck.CoM
You Can Find Me On socail Media
Shanzay Khan
Follow Me on Twitter
Find Me On Facebook
Follow Me On Google Plus

Sunday, 6 March 2016

How To JailBreak Iphone 4s,5,5s,5c (IOS 8)

Hello Readers My Name is Shanzay Khan & Today I Am Going TO Show You How To JailBreak Iphone 4s,5,5s,5c (IOS 8)
How To JailBreak Iphone 4s,5,5s,5c (IOS 8)

We Have Talked About Jailbreak What Is Jailbreak? What its Purpose in Previous Post So In This we Will Skip Wasting Time In Explaining Jailbrak & Will Start the Work

Lets Start:)
We Will Use Pangu For Jailbreaking Ios 8
Note: Make Sure You Have Already Backed Up Your Device
  • First Of All Go To Settings Disable Passcode Or Touch id Option & Turn Off Turn My Iphone Option Or Other-Wise jailBreak Will Fail 
  • First of All Download the Latest Version of Pangu For Mac Or windows
  • Link For Download Pangu For MAC:
    https://mega.nz/#!iZsWwSab!wHL63_4W3jqSHd0A9E63FjQ5DFiKv9yIczJFwFTzckw
  • Link For Download Pangu For WINDOWS:
    https://mega.nz/#!jdV0XLLC!q5usgz31WIuDq7K2M7F4zpXWzDQOgsLrY8Qz2LbfuLU
  • Then Install it After Installation Open Pangu & Wi8 For its Intillazition
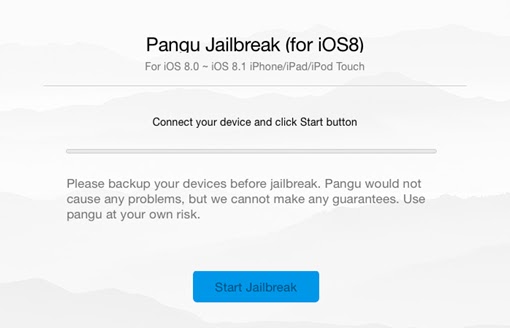
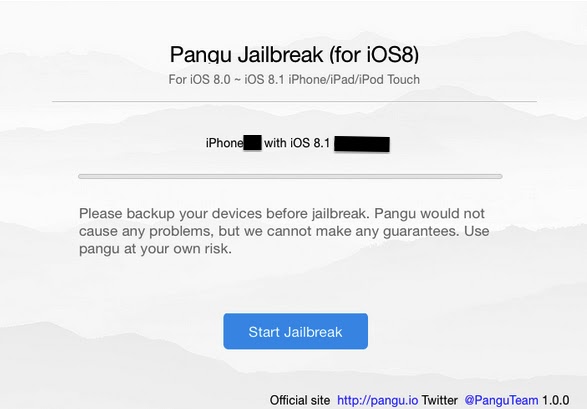
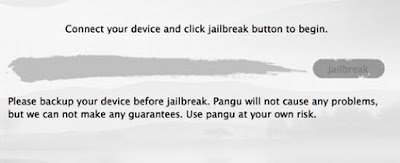
  • Then You will See This Window on Pangu:
How To JailBreak Iphone 4s,5,5s,5c (IOS 8)
  • Now Connect YOur Iphone To Your PC 
How To JailBreak Iphone 4s,5,5s,5c (IOS 8)
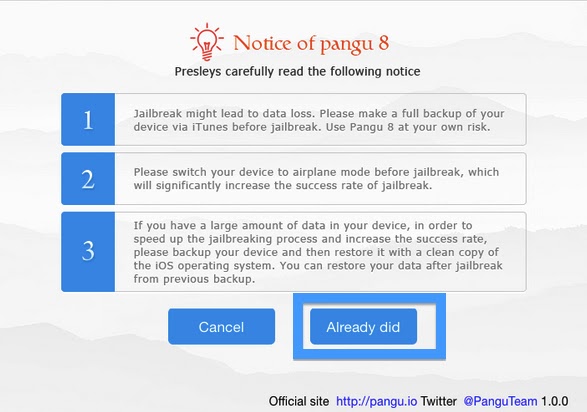
  • After Pangu Detects Your Iphone Click On Start JailBreak Then It Will Ask You For Confirmation Of Backup If You Have Already Backed Up Your Iphone Then Click Already Did 
How To JailBreak Iphone 4s,5,5s,5c (IOS 8)

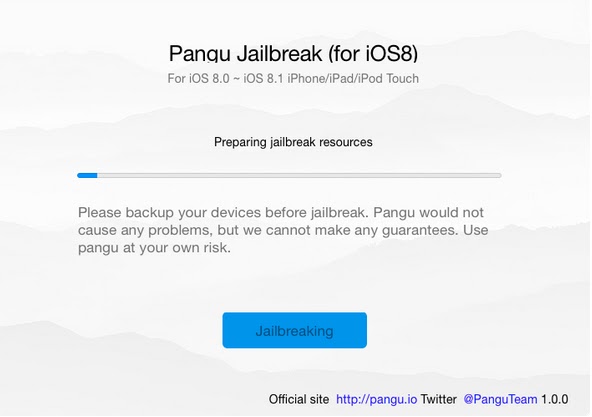
  •  Then Pangu Will Start Jailbreaking
How To JailBreak Iphone 4s,5,5s,5c (IOS 8)
As Jailbreak Completes It Will Notify You With Done Option & You Will Find the Latest Version Of Cydia On Your Device
Done you Have Successfully Jailbroken Your Device 
Enjoy & Keep Visiting MuZaMIlTriCks.COm

Saturday, 5 March 2016

How To JailBreak Iphone 4,4s, 5, 5s,5c (Ios 7)


Hello Readers my name is Shanzay khan & Today I Am Going To Show You How TO JailBreak Iphone 4,4s 5 5s,(Ios 7,)


How TO JailBreak Iphone 4,4s 5 5s,(Ios 7,)


So Lets Start ; 

What is Jailbreak You Can Google It For More Brief in Simple Words JailBreak Mean Getting the Root Of Your IDevice Like Wo Do In Android By Rooting It.
By Jailbreaking Your IDevice You Can Install Additional Apps Useful Extension & Download Anything That's The Apple App Store Does Not Allow Or Provide For Your Idevice
JailBreaking is the Process of Removing the Restrictions Of Apple From Your Idevice
  • So Now You Know About Jailbreaking then Lets Start The Work;-)
  • First of the the things you will need to jailbreak your iphone is 
  • A Computer Doesn't Matter its Window's Or Mac
  • A Usb Or Lightning Cable To connect your iphone to PC
  • A Software Called Pangu Offical Ios 7 Jailbreaker Installed On Your Computer
  • Link TO Download Pangu For WINDOWS:
    https://mega.nz/#!7N9wEIqT!G6MFGHk9hGEDpsCQfJlr6uRlJxXxmBFJsfpgtjWjsf0 
    • Link TO Download Pangu For WINDOWS:

    https://mega.nz/#!iZsWwSab!wHL63_4W3jqSHd0A9E63FjQ5DFiKv9yIczJFwFTzckw
     
  • Itunes Installed on your PC
If you have these things then you are good to go 
First of all connect your iphone with the PC & wi8 for the itunes to open & detect the Iphone  
Once iphone is detected Close the Itunes & Also  from the task manager.
  • Then Open The Pangu & Wi8 For It Until You Came To This Window On Pangu
How TO JailBreak Iphone 4,4s 5 5s,(Ios 7,)
 
  • Connect your iphone to your computer & Click Jailbreak
How TO JailBreak Iphone 4,4s 5 5s,(Ios 7,)


  • Then You Will See a POP Up On Your iphone screen asking you To
  • Set Your Device to 2 JUNE 2014
How TO JailBreak Iphone 4,4s 5 5s,(Ios 7,)
  • If You Adjusted Your Iphone Date Correctly You Will be Promoted To This Screen on pangu
How TO JailBreak Iphone 4,4s 5 5s,(Ios 7,)

  • As Soon The Injecting Process Starts Iphone Will Pop up with this Screen Click On Continue
How TO JailBreak Iphone 4,4s 5 5s,(Ios 7,)

  • Then The Jailbreaking Process Will Start Wi8 Fro it To Complete
How TO JailBreak Iphone 4,4s 5 5s,(Ios 7,)
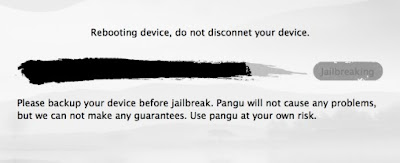
  • As Soon The Process Completes It Will Reboot Your Iphone During Reboot Do not Disconnect your iphone From PC
How TO JailBreak Iphone 4,4s 5 5s,(Ios 7,)


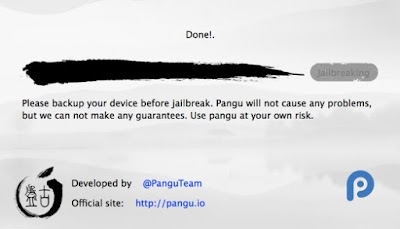
As The Reboot Complete Pangu Will Detect your device & will show you a MSG Done Now You Can unplug Your Device From PC
How TO JailBreak Iphone 4,4s 5 5s,(Ios 7,)
Now Your Iphone Has Been Successfully JailBroken 
Done Enjoy & Keep Visiting MuzamilTRicKs.CoM


Monday, 29 February 2016

How to Reinstall OS X On Macbook Using A BootAble Usb Disk

Hello Readers My name is Shanzay khan & Today i am going to show you How to Reinstall Mac OS X On Macbook Using BootAble Usb Disk
How to Reinstall Mac OS X On Macbook Using A BootAble Usb Disk
Lets Start ;

  1. Thing You Will Need To install Os X on Mac
  2. InterNet Connection For Recovery Software To Download The Installation Components
  3. Os X Dvd or If You have Downloaded It you Can Google it For Downloading OS X ISO 
  4.  Then 8 GigaByte of Usb Drive
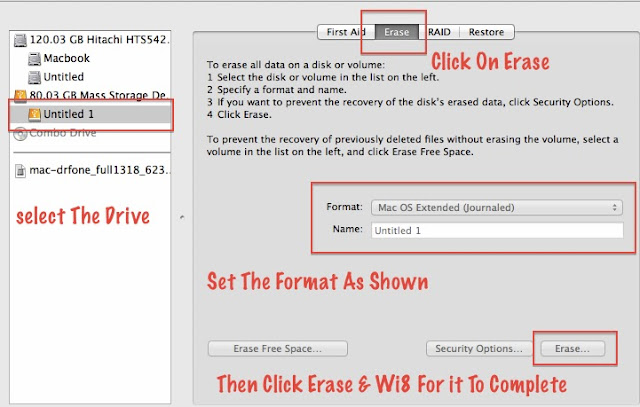
  • First Of All Insert Your Usb Drive in to Mac & Open Disk Utility & Click on Your Usb Drive
  •  Then Click on The Erase Option & Select FORMAT: Mac os Extended (Journaled) & Click Erase & Wait For it To Complete
Follow the Screenshots

How to Reinstall Mac OS X On Macbook Using A BootAble Usb Disk

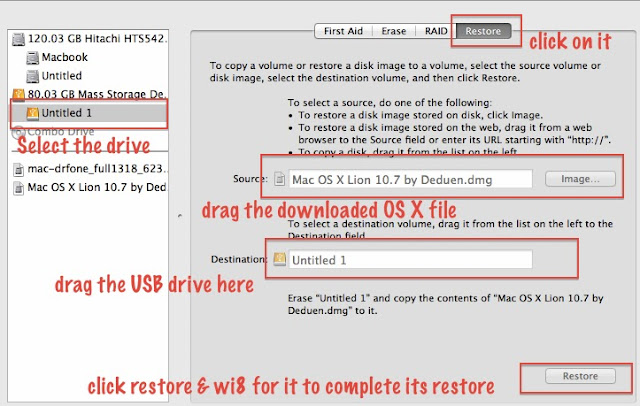
  • After The Erase Complete Click On The Restore Button & In The Source Drag the Downloaded Iso or Dmg File of OS X & in The Destination Drag the USB Drive & Click Restore It will Ask You To ERASE ALL THE DATA IN THE  USB & RESTORE OS X FILE IN IT CLICK ERASE & RESTORE.
Follow the Screenshots;
How to Reinstall Mac OS X On Macbook Using A BootAble Usb Disk


  • Now The Restore is Complete You Will Have To Reboot Your Mac Into Recovery
  • For Recovery You Will Have To Turn Off YOur MAc & Turn It On With Pressing The CMD+R Buttons On Your Mac
  • DONOT LEAVE THE CMD+R BUTTONS UNTIL THE APPLE LOGOS SHOWS UP
Follow The ScreenShots;
How to Reinstall Mac OS X On Macbook Using A BootAble Usb Disk

  • After that you will see the recovery screen with Your Connected Drives You Will Have To Choose the Restored Usb Drive
Follow The ScreenShots;
How to Reinstall Mac OS X On Macbook Using A BootAble Usb Disk

  • Select the Target Disk You Want To Install OS X In Mostly Cases If you didn't changed it It Will Be Written as MACINTOSH HD select it & Hit Enter
  • The Recovery Software Will Download Some Additional Components From Apple Server Required To install OS X on Mac Once This Process Completes your Mac Will Restart Automatically
  • Now After Restart You Will See The Black Screen With Apple Logo And The BAr Indicating That How Much Time Is Left In Installation
How to Reinstall Mac OS X On Macbook Using A BootAble Usb Disk

  • Now The Installation is Complete Mac Will Reboot Itself & Here You Go Installation is Complete
  • Now You Have to set up a new Mac By Creating A New User & By Entering Some Information About You
  • Done Enjoy A Fresh New Copy Of MAC OS X on Your Mac
  • For More Help Comments Below
Enjoy Your Self & Keep Visiting MUZAMILTRICKS.COM