Saturday, 13 February 2016

How To Install Android 6.0 MARSHMALLOW on Nexus Devices.


Hello Readers My Name is Shanzay Khan & Today I am Going To show You How To Install Android 6.0 MARSHMALLOW on Nexus Devices.


How To Install Android 6.0 MARSHMALLOW on Nexus Devices.

Lets Starts;
  • First of All Download The Required Tools & Firmware for Installation. 
  • Download The Firmware for your Nexus From the Link Below;
  • https://developers.google.com/android/nexus/images?hl=en
  • Then Download The Google Usb Drivers & Sdk manager+ Fast boot & Adp from the link below;
  • http://developer.android.com/sdk/win-usb.html
Before Starting this process Make Sure You have created Backup of All your Data in the device
After that make Sure You Have download the the right file for your Smartphone & The SDK Manager+ADP-Fastboot is Working properly on Windows.If You dont Know How To Use Adp just Google it;-)
Then Lets Start.
  
  • Step 1:
  • Unzip the Download firmware on Your Desktop in a New Folder.
  • Step 2:
  • Connect your Nexus Device To the Computer & Let The Computer Detects The Drivers.
  • Then Go To Settings & Erase All The Data On Your Device.
  • Step 3:
  • In this Step we will Flash Android MarshMallow on your Nexus Device 
  • Go To The Folder Where You have Extracted The Firmware & type In Search bar of Folder CMD it will find the all Related files To Cmd It Will Show following Files ( Run flash-all.bat),(flash-all.sh)
  • Open The File which Supports Your System
  • For Windows: Run flash-all.batFor Mac: Run flash-all.sh (in Macbook Open It Using Terminal)
  • After That Run It .
  • After Its Finished It will Reboot Your Device.
  • Step 4:

  • Then Open Adp & Enter the Foolowing Commands

  •  adb reboot bootloader 
  •  
  • Then,
  •  fastboot oem lock

  • Done Enjoy The Latest MarshMallow.
  • Keep visiting Muzamiltricks.Com

Friday, 12 February 2016

How To Bypass Facebook Photo Tag Verification With The Simplest Method (100% Working)

Hello Readers My name is Shanzay Khan & today I am Going to Show You How To Bypass Facebook Photo Tag Verification With The Simplest Method (100% Working)
Lets Start:
How To Bypass Facebook Photo Tag Verification With The Simplest Method (100% Working)


  • First of On Your Smartphone Download Tunnel-Bear App Available For All Users (Macbook,Windows,Ios,Android,Chrome,Opera)
  • Download link : https://www.tunnelbear.com/download
  • Download it & Install it in.
  • Now after installation change your location To japan or any Other Country Except Your home Country But i Prefer Japan.
  • Then now Log in To Your Facebook A/c
  • It Will Asked You for The catcha Code 
  • Here The Main Point You You Will Notice That it Will ask to enter your Mobile number instead of Photo Verification 
  • Just Simply Change The Japan Country Code With Your country code & Enter Your Mobile-Number
  • After Confirmation Your Number With code Your Facebook Blocked Account will Be Opened.

Done! Enjoy Hope It Will Help You & Keep Visiting Muzamiltricks.com


Wednesday, 10 February 2016

How to Increase Your Pc Ram Using External Usb Disk.

Hello Readers my name is Shanzay Khan & Today i am Going you to show How to Increase Your Pc Ram Using External Usb Disk.

Lets Start:


  • First of All before Performing this step Be sure your usb is Formatted.
  • Then Connect your Usb to your pc & go to System Properties You can Go to Your System Properties by Left Clicking On your PC Icon
  • Go to System Properties & Click on the Advance System 

How to Increase Your Pc Ram Using External Usb Disk.


  • After clicking on the advance System setting Click On the Settings

How to Increase Your Pc Ram Using External Usb Disk.
  • After click settings you will see Performance Option
  • In Performance Option Click Advance And In Virtual Memory Click Change
How to Increase Your Pc Ram Using External Usb Disk.
  • After that you will see Virtual Memory with The list of Your Ram-s & Your connected Usb Drive
  • Click on your Usb Drive Next set The Size You want To Be used As Ram
  • Then Set & then Click ok Make Sure To click Set First & Then Ok
How to Increase Your Pc Ram Using External Usb Disk.
 Done HoPe You Like It.
 Enjoy & Keep Visiting MUZAMILTRICKS.COM


How to Restore (iOS 7 ,8,9) iphone 4, 4s, 4g , 5 ,5s, 5c, 6, 6s, 6plus, 6s-plus.

Hello readers my Name is Shanzay khan 

Today i am going you to show how to Restore iOS 7 ,8,9
iphone 4, 4s, 4g , 5 ,5s, 5c, 6, 6s, 6plus, 6s-plus.

How to Restore (iOS 7 ,8,9) iphone 4, 4s, 4g , 5 ,5s, 5c, 6, 6s, 6plus, 6s-plus.

NOTE :MUZAMILTRICKS DOES NOT PROVIDE ANY JALBREAK TO ANY IPHONE OR DOES NOT PROVIDE ANY PATCHES .ITS JUST A SIMPLE METHOD FOR HELPING PEOPLES

i will make it simple because i have briefed it in my older post about every step and erverthing.

Things u will need is:
Itunes 12 
Ipsw Frimware (iOS)
Recboot for entering into Recovery

I am creating this post for those who had disabled there iPhone with entering  wrong pass-code or by any other reason
Lets start!


  • connect your disabled iPhone to pc 
  • open reboot click enter recovery once u entered into recovery 
  • open iTunes & iTunes should have detected iPhone in recovery mode 
  • click restore & let the iTunes download the Ipsw for your iPhone & then it will restore it in your iPhone 
  • 2Nd Method
  • if you Want to restore manually Go to: 
  • www.ipsw.me 
  • download firmware for your iPhone & save it on the desktop
  • now open iTunes press Shift if using Windows Or Press ALT if using Mac
  • click on the restore by press the key
  • select the ipsw & then click open
  • let the iPhone be restored after then Setup ur new iPhone by entering your  apple id & password
having any problem comments below .
enjoy!


kepp visiting MUZAMILTRICKS.COM

Monday, 8 February 2016

How to Reset OR install a new iOS on Disabled iPhone

Hello Readers My name is Shanzay khan
 Today i,M going to show you how to Reset OR install a new iOS on
 Disabled iPhone

NOTE:this tricks is only for IPHONE 1, IPHONE 2,2G, IPHONE 3G,3GS & iOS below than iOS 7

trick for iPhones upper than iOS 7 will be uploaded soon!

How to Reset OR install a new iOS on Disabled iPhone


Note: Muzamiltricks does not provide any crack,Patches, iPhone Jailbreaking or something else Which leads to hacking this is just a tricks for those peoples who don't know how to reset a disabled iPhone & they pays a lot of money to software shops Or someone else for repairing their iphones


THIS CAN BE DONE ON BOTH WINDOWS & MACBOOK

First of all the things u will need to restore a disabled iPhone
U Should have installed latest version of #Itunes on ur system


Download it From:
http://www.apple.com/itunes/download/

And the second thing u will need A iOS firmware u can download it manually from:
https://ipsw.me/
or u can download it from iTunes that i will show u in net steps & the lat thing u will need is
RecBoot to enter ur iPhone into recovery mode for reinstalling the iOS
download it from:
www.cydiaos.com/download-recboot
Here U can find reboot for mac and widows too...
Lets Start!
1.First of all connect your disabled iPhone with computer iTunes will pop-up with some msg(iTunes is table to connect iPhone because it is locked or disabled) press ok & close that error msg windows but let the iTunes remain open.
How to Reset OR install a new iOS on Disabled iPhone
2.Then open RecBoot & u will see that RecBoot Has recognizes your iPhone & there is two options in RecBoot
A.Enter Recovery
B.Exit  Recovery
press enter recovery & wait until iPhone get into recovery mode

Once iPhone entered into recovery-mode it will look like this on iPhone screen

How to Reset OR install a new iOS on Disabled iPhone


iTunes will pop-up with the msg(iPhone has been detected into recovery mode Press restore To restore iOS into iPhone.How to Reset OR install a new iOS on Disabled iPhone

Now the Main Part If You want that iTunes downloads the iOS directly from APPLE server then just click On RESTORE & then next,next & then Restore.
or if you want to restore an iOS manually that u have downloaded from the link above then ON MAC: Press ALT & click on the restore button this will take u to directory & from there u can go to that folder where u have downloaded iOS find it,click it & click OPEN
If U are On the windows Then u have to Press SHIFT & the above method .
How to Reset OR install a new iOS on Disabled iPhone

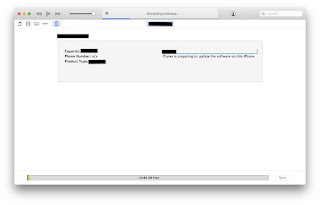
Once iTunes successfully extracted it ,it will verify i from APPLE SERVERS & i will start your restore
How to Reset OR install a new iOS on Disabled iPhone

As the restore completes iTunes Will pop-up & notify u that iOS restore has been completed & set up your new iPhone
How to Reset OR install a new iOS on Disabled iPhone

slide it on iPhone setup up your new iPhone

Note:YOU WILL NEED A VALID & UNLOCKED SIM TO ACTIVATE YOUR IPHONE ONCE YOU HAVE ACTIVATED IT.
ENJOY UR NEW IPHONE.
Keep visiting MUZAMILTRICKS.COM & STAY TUNNED FOr MORE IPHONE TRICKS.

Sunday, 7 February 2016

How to Put Your iPhone into DFU Mode & in RECOVERY Mode in Simplest Steps

Hello users
My name is SHANZAY KHAN & today i am going you to show u how to put your iPhone into DFU mode & in RECOVERY mode in simplest steps
How to Put Your iPhone into DFU Mode & in RECOVERY Mode in Simplest Steps


Lots of people have problem with DFU MODE because in DFU mode

ACCORDING to software you have to turn your device off .
then press then power button for 3 seconds
then press home button too for 10 seconds but don't leave the power button
then after ten seconds leave the power button but keep holding the home button its too complicated

I suggest u the simplest method which is:

Press The HOME & The POWER Buttons Togather Until The Phone Gets Off the After 3 Sec Realse The Power Button But Keep Holding The HOme Button For MAXIMUM 10 sec DONE

u R iN DfU MoDE NoW U CaN rESTOre ThE EDITED IPSW ON IPHONE USING ITUNEs
For Recvory simply download the software from the link & open it.
www.RecBoot.com/Downloads.
Enjoy!
Keep Visiting #MUZAMILTRICKS.COM

Routers & Their IP Addresses :-)

Hello Readers My name is Shanzay Khan & Today i am going to share some common & most using Routers IP Addresses

So here are the some Ip addresses Hope you will like them:-)


Routers & Their IP Addresses :-)

ROUTERS  & Default Adresses


1.Ptcl-BB
 192.168.1.1
192.168.10.1
192.168.1.06

2.2Wire
192.168.1.1
192.168.0.1
192.168.1.254
10.0.0.138

3.3Com
192.168.1.1
192.168.1.10.1

4.Actiontec
192.168.1.1
192.168.0.1
192.168.2.1
192.168.254.254

5.Airlink
192.168.1.1
192.168.2.1

6.Airlive
192.168.2.1

7.Airties
192.168.2.1

8.Apple
10.0.1.1

9.Amped Wireless
192.168.3.1

10.Asus
192.168.1.1
192.168.2.1
10.10.1.1

11.Aztech
192.168.1.1
192.168.2.1
192.168.1.254
192.168.254.254

12.Belkin
192.168.1.1
192.168.2.1
10.0.0.2
10.1.1.1

13.Billion
192.168.1.254
 10.0.0.2

14.Buffalo
192.168.1.1
192.168.11.1

15.Dell
192.168.1.1

16.Cisco
192.168.1.1
192.168.0.30
192.168.0.50
10.0.0.1
10.0.0.2

17.D-Link
192.168.1.1
192.168.0.1
192.168.0.10
192.168.0.101
192.168.0.30
192.168.0.50
192.168.1.254
192.168.15.1
192.168.254.254
10.0.0.1
10.0.0.2
10.1.1.1
10.90.90.90

18.Edimax
192.168.2.1

19.Eminent
192.168.1.1
192.168.0.1
192.168.8.1

20.Gigabyte
192.168.1.254

21.Hawking
192.168.1.200
192.168.1.254

 22.Huawei
192.168.1.1
192.168.0.1
192.168.3.1
192.168.8.1
192.168.100.1
10.0.0.138

23.LevelOne
192.168.0.1
192.168.123.254

24.Linksys
192.168.1.1
192.168.0.1
192.168.1.10
192.168.1.210
192.168.1.254
192.168.1.99
192.168.15.1
192.168.16.1
192.168.2.1

25.Microsoft
192.168.2.1

26.Motorola
192.168.0.1
192.168.10.1
192.168.15.1
192.168.20.1
192.168.30.1
192.168.62.1
192.168.100.1
192.168.102.1
192.168.1.254

27.MSI
192.168.1.254

28.Netgear
192.168.0.1
192.168.0.227

29.NetComm
192.168.1.1
192.168.10.50
192.168.20.1
10.0.0.138

30.Netopia
192.168.0.1
192.168.1.254

31.Planet
192.168.1.1
192.168.0.1
192.168.1.254

32.Repotec
192.168.1.1
192.168.10.1
192.168.16.1
192.168.123.254

33.Senao
192.168.0.1

34.Siemens
192.168.1.1
192.168.0.1
192.168.1.254
192.168.2.1
192.168.254.254
10.0.0.138
10.0.0.2

35.Sitecom
192.168.0.1
192.168.1.254
192.168.123.254
10.0.0.1

37.SMC Networks
192.168.1.1
192.168.0.1
192.168.2.1
10.0.0.1
10.1.10.1

38.Sonicwall
192.168.0.3
192.168.168.168

39.SpeedTouch
10.0.0.138
192.168.1.254

40.Sweex
192.168.15.1
192.168.50.1
192.168.55.1
192.168.251.1

41.Tenda
192.168.1.1
192.168.0.1

42.Thomson
192.168.0.1
192.168.1.254
192.168.100.1

43.TP-Link
192.168.1.1
192.168.0.1
192.168.0.254

44.Trendnet
192.168.1.1
192.168.0.1
192.168.0.30
192.168.0.100
192.168.1.100
192.168.1.254
192.168.10.1
192.168.10.10
192.168.10.100
192.168.2.1
192.168.223.100
200.200.200.5

45.U.S. Robotics
192.168.1.1
192.168.2.1
192.168.123.254

46.Zoom
192.168.1.1
192.168.2.1
192.168.4.1
192.168.10.1
192.168.1.254
10.0.0.2
10.0.0.138

47.ZTE
192.168.1.1
192.168.0.1
192.168.100.100
192.168.1.254
192.168.2.1
192.168.2.254

48.Zyxel
192.168.1.1
192.168.0.1
192.168.2.1
192.168.4.1
192.168.10.1
192.168.1.254
192.168.254.254
10.0.0.2
10.0.0.138

These were the Adresses
Like it Then keep visiting Muzailtricks.com