Hello Readers my name is
Muzamil Hussain.Today i,m Going to Tell You How To Add A Google Translate Widget To Your Blogger Blog.If your blogger blog is starting to draw an audience and traffic from overseas or you need to team up with different schools over everywhere throughout the world, you will need to locate an extraordinary approach to decipher your blogger blog content into various dialects of the world.So, a standout amongst the most vital inquiries we get from movement or our guests or companions is the means by which to actualize Google Translator gadget on their blogger blogs.This brisk and simple procedure will help you set up a Google Translator gadget to your blogger blog to make it very easy for increasing your blog audience to translate your website with the help of a single click.
Add A Google Translate Widget To Your Blogger Blog
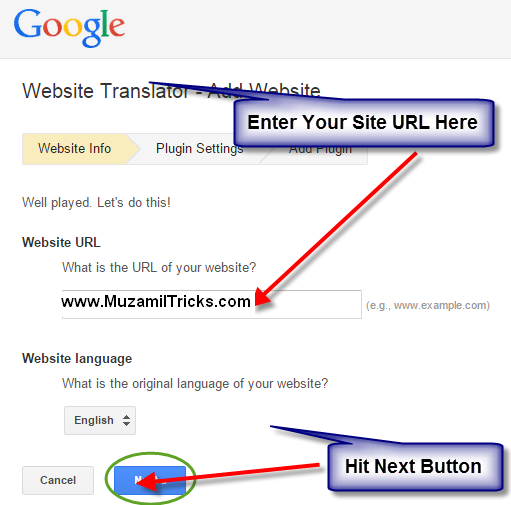
- First Of All Go To Google Translator Link.
- After This, This Page Asking To You To Enter Your WebSite Address Where You Want To Display That Google Translator Widget.
 |
| Add A Google Translate Widget To Your Blogger Blog |
- Just Enter Your Web Site Address.
- Now Hit On "Next" Button.
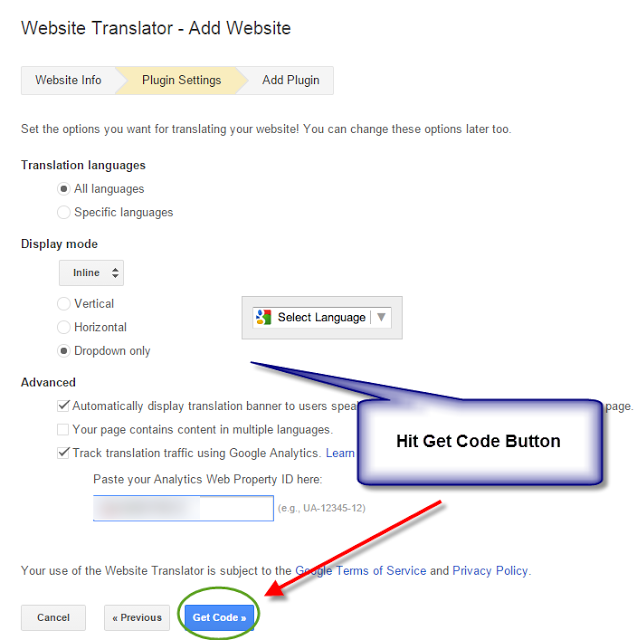
- You Are At 2nd Stage.
 |
| Add A Google Translate Widget To Your Blogger Blog |
- Just Hit "Get Code" Button.
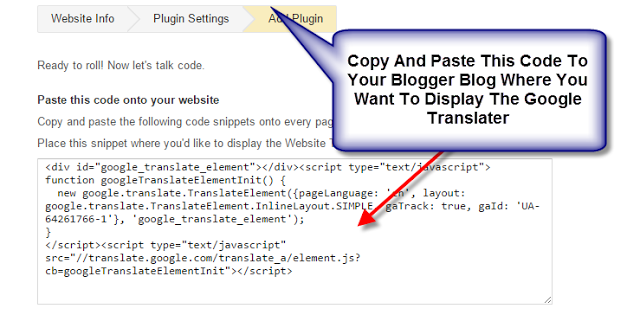
- A Code Will Be Appear/Generate,Just Copy That Piece Of Code.
 |
| Add A Google Translate Widget To Your Blogger Blog |
- Now You Go To Your Blogger Dashboard.
- Select "Layout".
- Select " Add A Gadget" Link.
- And Open HTML/JavaScript Widget.
- Just Paste Your Google Translator Code In To That Blog Widget.
- Save Your Widget.
- Now Visit your Blog,You Can See Your Working Google Translator.
If you Like this Article Soo Share your,s Friends and tell About our site,If you have any problem soo contect us Feel Free Thanx.


0 comments:
Post a Comment